

Free Crochet on Fabric Pattern, Free Crochet Pattern, Free Pattern, Free Sporty Weight Yarn Pattern, Sea Glass Patterns
Sea Glass Keepsake Cuffs | 5 Free Crochet on Fabric Patterns
May
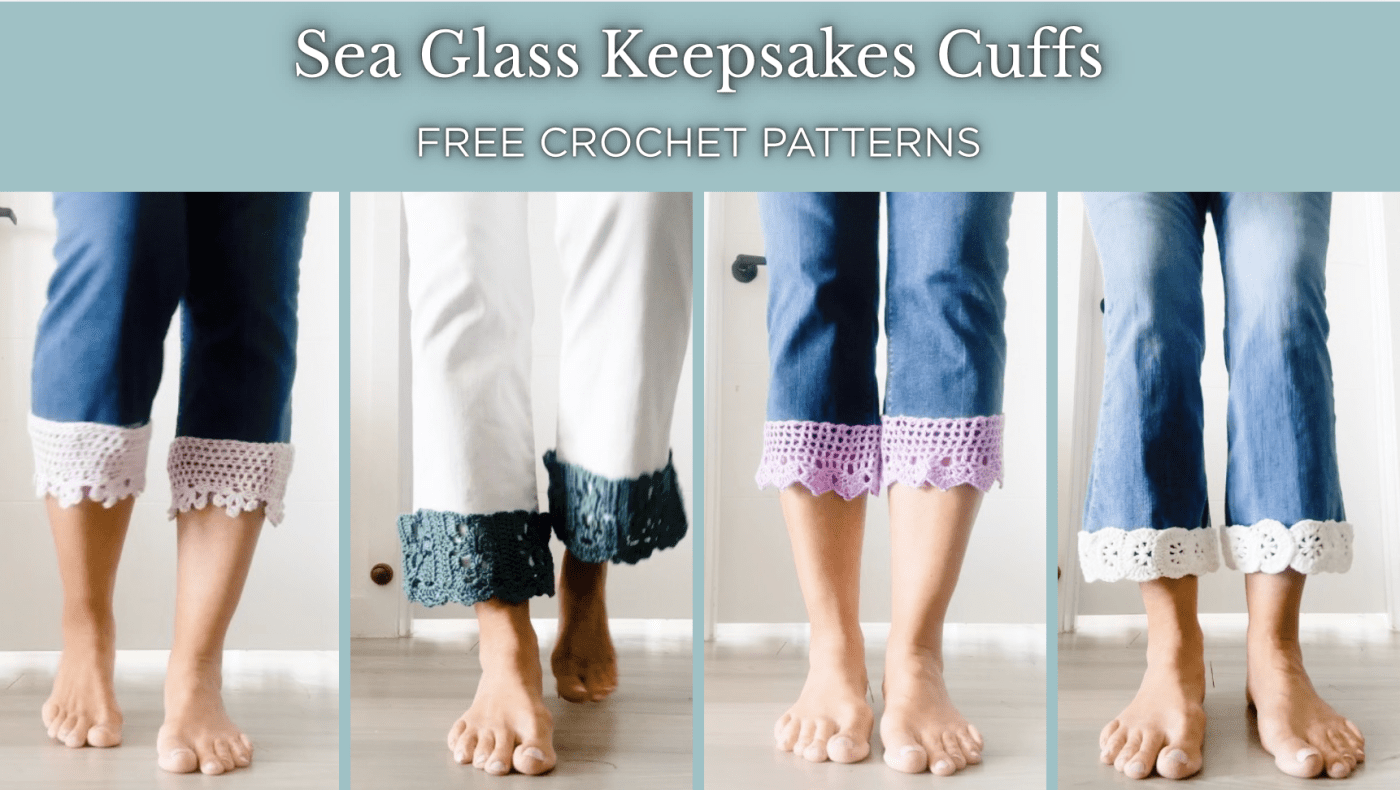
Sea Glass has always symbolized transformation to me — broken pieces softened by time, tide, and persistence into something beautiful again. That same inspiration carried into this collection of crochet-on-fabric cuffs designed to add a touch of handmade artistry to everyday denim.
The Sea Glass Keepsake Cuffs collection includes five unique crochet cuff designs inspired by coastal textures, vintage lace, weathered architecture, sea oats dancing in the wind, and treasured keepsakes collected along the shore. Each cuff is designed to be stitched directly onto fabric, making them perfect for customizing jeans, jackets, tote bags, or other wardrobe staples with elegant handmade details.
Whether you’re looking to refresh a favorite pair of denim or experiment with crochet on fabric techniques for the first time, these projects are approachable, versatile, and endlessly customizable. Use delicate thread for a refined boutique look, or experiment with color, beads, charms, or contrasting fabrics to create your own signature style.
This collection includes:
- Harbor Window Cuff
- Sea Oats Cuff
- Palm Court Cuff
- Tidal Trellis Cuff
- Compass Rose Cuff
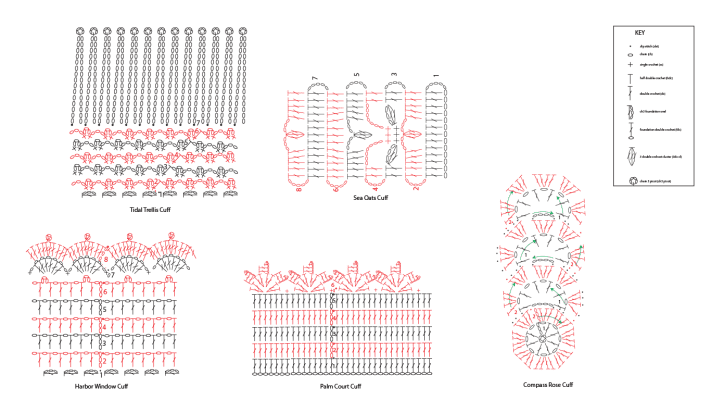
Each pattern includes written instructions, stitch charts, and tips for attaching crochet to fabric. I’ll also be sharing step-by-step tutorial videos and styling inspiration to help you turn simple denim into wearable keepsakes inspired by the coastal spirit of The Sea Glass Journal.
What you will need:
- 100 yds #2 sport weight yarn for each pair of cuffs
- E/4 (3.5mm) crochet hook
- yarn needle
- scissors
Finished size: Will vary depending on item you are embellishing.
Gauge: Will vary depending on yarn, hook size, stitch pattern, and fabric used. Make a gauge swatch if needed.
Note:
Because these crochet cuffs are designed to embellish fabric, finished size and gauge will vary depending on the garment or project you choose and the fit you prefer. The instructions and stitch counts provided in these patterns are based on the exact denim cuffs used for my samples, but you may need to adjust stitch counts, repeats, or foundation rounds to fit the circumference of your own pant legs, jacket sleeves, tote bags, skirts, or other fabric projects.
Before beginning, measure the area you wish to embellish and compare it to the stitch multiple or motif repeat used in the pattern. You can easily add or subtract repeats to customize the fit while maintaining the overall design.
Keep in mind that different fabrics, yarns, threads, hook sizes, and personal tension may also affect the finished measurements, stretch, and drape of your crochet embellishments.
These designs are intended to encourage creativity and personalization, so think of the patterns as a framework for creating your own wearable keepsakes inspired by the coast.
Watch Each Crochet Pattern’s Tutorial Video Here:
Tutorial Videos Coming Soon to Kristin’s YouTube Channel
Instructions:
 Harbor Window Cuff Instructions
Round 1: Ch3, dc in 3rd ch from hook. Rep from * 21 more times, slst to first oval to join in a ring being careful not to twist. — 22 foundation double crochets
Round 2: Ch4 (counts as dc, ch1), dc in next foundation oval (fo), ch1, dc before next fo, ch1. Rep from * around, slst to 3rd ch of beg ch4 to join.
Round 3: Ch4 (counts as dc, ch1), dc in next dc, *ch1, dc in next dc. Rep from * around, ch1, slst to 34d ch of beg ch4 to join.
Round 4 – 5: Rep row 3.
Round 6: Ch4 (counts as dc, ch1), dc in next dc, ch1, dc in next dc, *ch3, dc in next dc, (ch1, dc in next dc)x3. Rep from * around, ch3, dc in next dc, ch1, slst to 3rd ch of beg ch4 to join.
Round 7: Slst into first ch1 sp, ch1, sc in same sp, *skip next ch1 sp, (ch1, dc)x6 in next ch3 sp, ch1, skip 1 ch1 sp, sc in next ch1 sp. Rep from * around, except on last repeat replace sc with slst to top of sc at beg of round to join.
Round 8: Slst across next (ch1 sp, sc and ch1 sp), ch3 (counts as dc), *1dc ea in next (dc, ch1, and dc), (dc, ch3 picot, dc) in next ch1 sp, 1dc in ea of next (dc, ch1, and dc), dc2tog over next and 4th ch1 sps (skip the two between). Rep from * across, except on last repeat, omit last dc2tog st and dc in next ch1 sp. Fasten off.
Sea Oats Cuff Instructions
Row 1: Ch18, dc in 6th ch from hook and ea ch across, turn. — 13 dcs
Row 2: Ch5 (does not count as a st throughout), 1dc in ea of next 5 dcs, ch3, skip 1 dc, 3dc-cl in next dc, ch3, skip 1 dc, 1dc in ea of next 5 dcs, turn.
Row 3: Ch5, 1dc in ea of next 2 dcs, ch3, 2dc-cl in 3rd ch from hook, 1sc in next ch3 sp, 1sc in next cl st, 1sc in next ch3 sp, ch3, 2dc-cl in 3rd ch from hook, skip 3 dcs, 1dc in ea of next 2 dcs, turn.
Row 4: Ch5, 1dc in ea of next 2 dcs, ch7, 1sc in ea of next 3 scs, ch7, 1dc in ea of next 2 dcs, turn.
Row 5: Ch5, 1dc in ea of next 2 dcs, 3dc in next ch7 sp, ch3, skip 1 sc, 3dc-cl in next sc, ch3, skip 1 sc, 3dc in next ch7 sp, 1dc in ea of next 2 dcs, turn.
Row 6: Ch5, 1dc in ea of next 5 dcs, 1dc in next ch3 sp, 1dc in next cl st, 1dc in next ch3 sp, 1dc in ea of next 5 dcs, turn.
Row 7: Ch5, 1dc in ea st across, turn.
Rep rows 2 – 7 for desired length, but end on a row 6 for last repeat.
Note: Edging can be joined as you go to adjacent fabric by replacing ch5 with joining ch5 at the beginning of either each odd numbered or even numbered row.
Assembly: Fold cuff in half so last row is held together with starting chain, slst through both thicknesses to turn the strip into a tubular cuff. Do not fasten off.
Edging: Round 1: Slst into first ch5 sp, ch1, sc in same sp, *9dc in next ch5 sp, sc in next ch5 sp. Rep from * around, except on last repeat replace last sc with slst to first sc at beg of round to join.
Round 2: Slst into first dc, ch1, sc in same st, ch3, 2dc-cl in same st, (skip 2 dcs, sc in next dc, ch3, 2dc-cl in same st)x2, *ch1, skip 1 sc, sc in next dc, ch3, 2dc-cl in same st, (skip 2 dcs, sc in next dc, ch3, 2dc-cl in same st)x2. Rep from * around, slst to top of first sc at beg of round to join.
Palm Court Cuff Instructions
Round 1: Foundation dc 48 sts, slst to first st at beg of round to join.
Round 2: Ch3 (counts as dc), 1dc in ea st around, slst to top of ch3 at beg of round to join.
Rounds 3 – 6: Rep round 2.
Round 7: Ch1, sc in first st, *skip 3 sts, in next st work [(2dc, ch4, esc in 2nd ch from hook, dc in ea of next 2 chs)x3, 2dc], skip 3 sts, sc in next st. Rep from * around. Slst to first st at beg of round to join. Fasten off.
Tidal Trellis Cuff Instructions
Round 1: Ch3, dc in 3rd ch from hook. Rep from * 21 more times, slst to first oval to join in a ring being careful not to twist. — 22 foundation double crochets
Round 2: Slst into first foundation oval (fo), ch1, (sc, ch3, sc) in same sp, *ch3, (sc, ch3, sc) in next fo. Rep from * around, ch1, hdc to first sc at beg of round to join.
Round 3: Ch1, (sc, ch3, sc) in same sp, *ch3, skip next ch3 sp, (sc, ch3, sc) in next ch3 sp. Rep from * around, ch1, skip last ch3 sp, hdc to first sc at beg of round to join.
Rounds 4 – 6: Rep round 3.
Round 7: *Ch19, sc in 4th ch from hook (ch15, ch4 picot made), ch15, slst in same ch3 sp. Ch19, sc in 4th ch from hook, ch15, slst in next ch3 sp. Rep from * around. Fasten off.
Compass Rose Cuff Instructions
Motif 1
Ch4, slst in 4th ch form hook to form ring.
Round 1 (RS): Ch4 (Counts as dc, ch1), (dc, ch1)x7 in ring, slst in 3rd ch of beg ch4 to join, turn.
Round 2: Slst in next ch1 sp, ch3 (counts as dc), 3dc in same ch1 sp, 4dc in ea ch1 sp around, slst in top of beg ch3 to join.
Motif 2:
Row 1: Ch4, skip 2 sts on last rnd of prev motif, slst in ea of net 3 sts, turn, [(dc, ch1)x5, dc] in next ch4 sp, skip next 2 sts on last rnd of prev motif, slst in ea of next 3 sts, turn.
Row 2: 4dc in ea ch1 sp across, skip next st on last rnd of prev motif, slst in next st, turn.
Motif 3:
Row 1: Slst in ea of next 9 sts on last rnd of prev motif, ch4, skip next 2 sts, slst in ea of next 3 sts, turn, [(dc, ch1)x5, dc] in next ch4 sp, skip next 2 sts on last rnd of prev motif, slst in ea of next 3 sts, turn.
Row 2: 4dc in ea ch1 sp across; skip next st on last rnd of prev motif, slst in next st.
Rep Motif 3 for desired length. Fasten off.
Note: Crochet 5 sts along edge of each middle motif and 7 sts along each edge of first and last motifs for working perpendicularly from the edging.
Assembly & Styling Options
These crochet embellishment cuffs are designed to be versatile, customizable, and easy to adapt to your own wardrobe and creative style. While I used denim pant cuffs for my samples, you can absolutely use these designs on so much more!
Try adding crochet trims and embellishments to:
- jean hems
- skirt hems
- sleeve cuffs
- jacket sleeves
- shorts
- tote bags
- pockets
- collars
- dresses
- home décor projects
- or anywhere you’d like to add a handmade touch.
There are several ways to attach your crochet pieces depending on the look and permanence you prefer:
Sew-On Method
For the most durable and polished finish, hand sewing or machine stitching your crochet motifs directly onto the fabric works beautifully. This is especially helpful for garments that will be washed frequently.
Fabric Glue Method
Fabric glue is a great no-sew option for quick styling projects, temporary embellishments, or lightweight decorative accents. Be sure to follow the manufacturer’s instructions and test on scrap fabric first if needed.
Crochet Directly Onto Fabric
You can also crochet directly onto fabric by evenly spacing holes along the fabric edge using a sharp crochet hook, skip stitch blade, rotary tool, or sewing machine needle. This creates a beautiful integrated finish and opens up endless possibilities for custom edging designs.
For photo styling and experimentation, even temporary options like fashion tape or double-sided fabric tape can help you audition placement ideas before permanently attaching your embellishments.
Most importantly — have fun making these designs your own! Mix colors, layer motifs, add beads or charms, and experiment with placement to create a one-of-a-kind piece that reflects your personal style.
About Kristin Omdahl
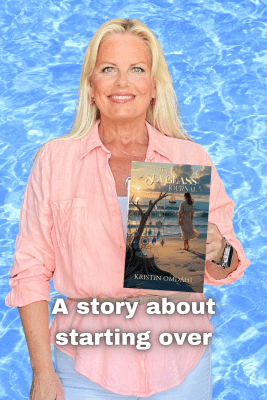 Kristin Omdahl is an author, designer, and lifelong maker with over 20 years of experience creating crochet and knit patterns, books, and tutorials. With more than 1,000 designs published worldwide, her work blends creativity, technique, and a love of storytelling.
She is also the author of The Sea Glass Journal, a novel that weaves together themes of creativity, self-discovery, and coastal living—often inspiring the patterns, recipes, and projects she shares.
Explore more patterns, tutorials, and the world of The Sea Glass Journal at KristinOmdahl.com.
