
Aug
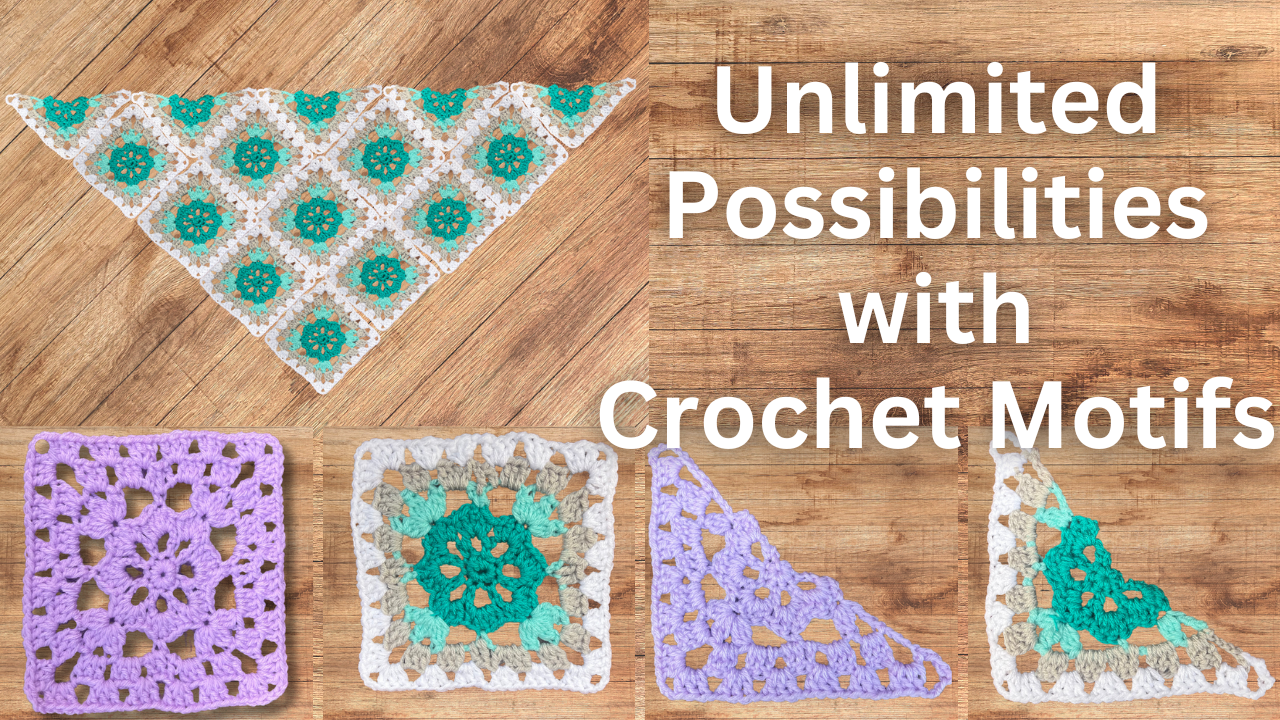
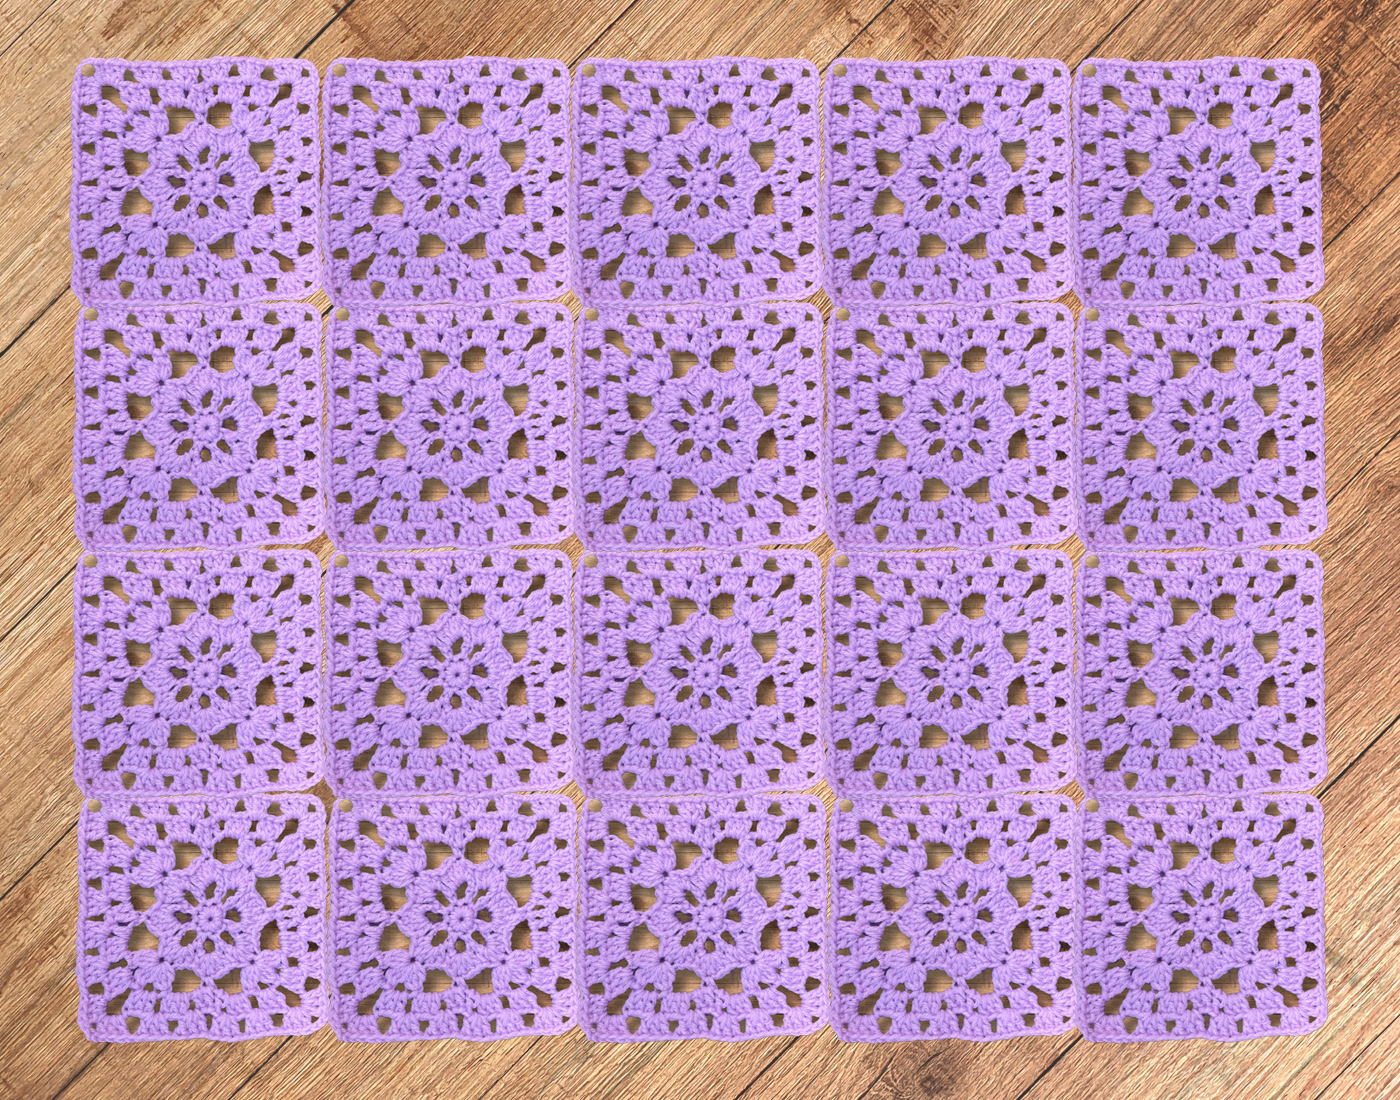
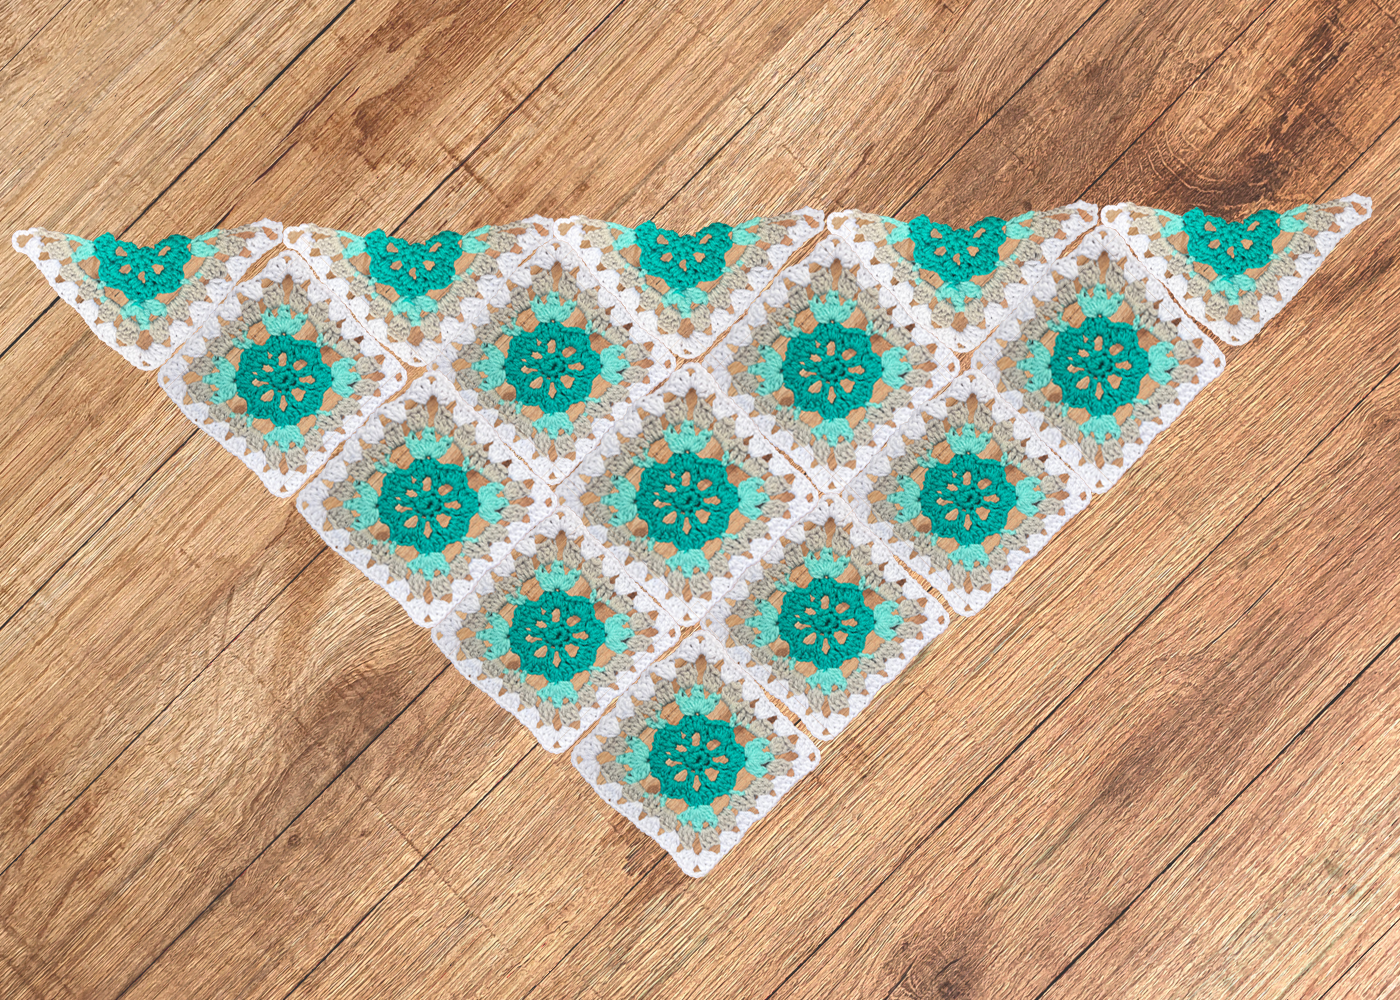
Crochet Motifs are a wonderful technique to learn once you decide to learn how to crochet. They are small, portable and can be combined in many different ways for unlimited possibilities for your crochet projects. You can learn how to crochet many different square motifs and their half motif counterparts, triangle motifs; learn how to crochet hexagon motifs and their half motif counterparts (half hexagons), etc; you can learn how to join them together with a variety of techniques; and you can learn how to create a variety of motif fabrics and projects including shawls, shrugs, bags, afghans, garments and more.
The beautiful and simple Amelia crochet motif, when worked in both both square and triangle shapes, can be combined in many variations for unlimited projects. Use any weight yarn and appropriately sized crochet hook for even more variety. The samples shown are in #4 worsted weight yarn and H/8 (5mm) crochet hook.
Watch Amelia Crochet Motif Video Tutorials Here:
How to Join Crochet Motifs with Multiple Techniques:
Joining motifs together can be accomplished in a variety of creative ways. There is no specific way in which it must be done. As long as your motifs are securely joined, you can sew or crochet them together in any of the following ways or explore for yourself and see what works best for you.
Sewn Seam
You can omit crocheting your motifs together and just sew them with yarn needle and excess yarn. Be sure to apply the right amount of tension on your yarn as you sew them together: too tight and you will pucker the seam; too loose and your seam may loosen and fall apart over time. Securing the seam and weaving in your ends well is very important. Sewn seams can unravel much more frequently than crocheted seams if not done right. Take your time and be thorough for a good, long lasting finish.
Slip Stitch Seam
This is the simplest of crochet seams and will create a ridge that you can use as a design feature or choose to assign this as the back side and then the seam will be more invisible on the right side. If you are struggling with tension, I sometimes prefer to alternate a chain between each slip stitch join.
Reverse Single Crochet Seam
This seam features a piped texture border between the motifs. It can be pretty in the same color yarn as the motifs or in a contrast color for a more striking textured border.
Reverse Single Crochet (RSC): Insert hook back into previous stitch (to the right), yarn over, pull up a loop twisting hook around to face upwards, yarn over and pull through both loops on hook.
Pin motifs together with wrong sides facing. Join yarn with slst to the left edge of both motifs together and reverse single crochet across each stitch in both motifs at the same time (working through both thicknesses together). You can choose to work through both loops of both motifs. Or work in the back loop of the motif closest to you and the front lop of the motif farthest from you to have the front loops exposed on right sides between the texture of the RSC join.
Double Crochet Seam
This can be used on both lacy motifs or motifs that end with a solid stitch border. Simply crochet a double crochet in each stitch (and/or ch sp) around, working 1 double crochet on one motif and then working the next double crochet on the adjacent motif.
Hold motifs together with wrong sides facing. Join the yarn with a slst to the edge of the motif closest to you. Ch3 (counts as dc), skip same st on adjacent motif and dc in next st on adjacent motif, *skip next st on current motif, dc in next st on current motif, skip next st on adjacent motif, dc in next st on adjacent motif. Rep from * across, fasten off.
Chain Space Seam
This can be used on both lacy motifs or motifs that end with a solid stitch border. Simply alternate which motif gets the single crochet after each chain space.
Align the edges of the motifs side by side, and join the yarn with a slst to either motif. Ch1, sc in same sp, *ch3 (or any specified number of chains), sc in next sp on adjacent motif, ch3, sc in next sp on current motif. Rep from * across.
Note: Depending on the length of your chain, you will skip a specified number of sts or ch sps between single crochets on this seaming technique.
Slip Stitch Seams
This is one of the most used types of joining motifs together and is worked in pattern while the current motif is being crocheted. While the previous seaming techniques are applied to finished motifs, this technique joins motifs together as you go, before fastening off the current motif.
Crochet one motif to the end and fasten off. On the last round of your next motif, crochet to the last round.
Follow the directions for the last round of the motif but replace any chain space with a joining chain space. If the seam is still to sparse, you can also slst to the adjacent stitch in specified sections of the pattern, too.
Simple Joining As you Go Crochet Conversions:
- Ch3 space converts to a joining ch3 sp: ch1, slst to adjacent ch3 sp, ch1.
- Ch5 space converts to a joining ch5 sp: ch2, slst to adjacent ch5 sp, ch2.
Note: It is obvious to replace the center ch with a slst on an odd number ch sp (ch3, ch5, etc). On an even numbered chain space, replace as follows:
- Ch2 sp converts to ch1, slst to adjacent ch2 sp, ch1.
- Ch4 sp converts to ch2, slst to adjacent ch4 sp, ch2.
You Have Unlimited Possibilities with Crochet Motifs.
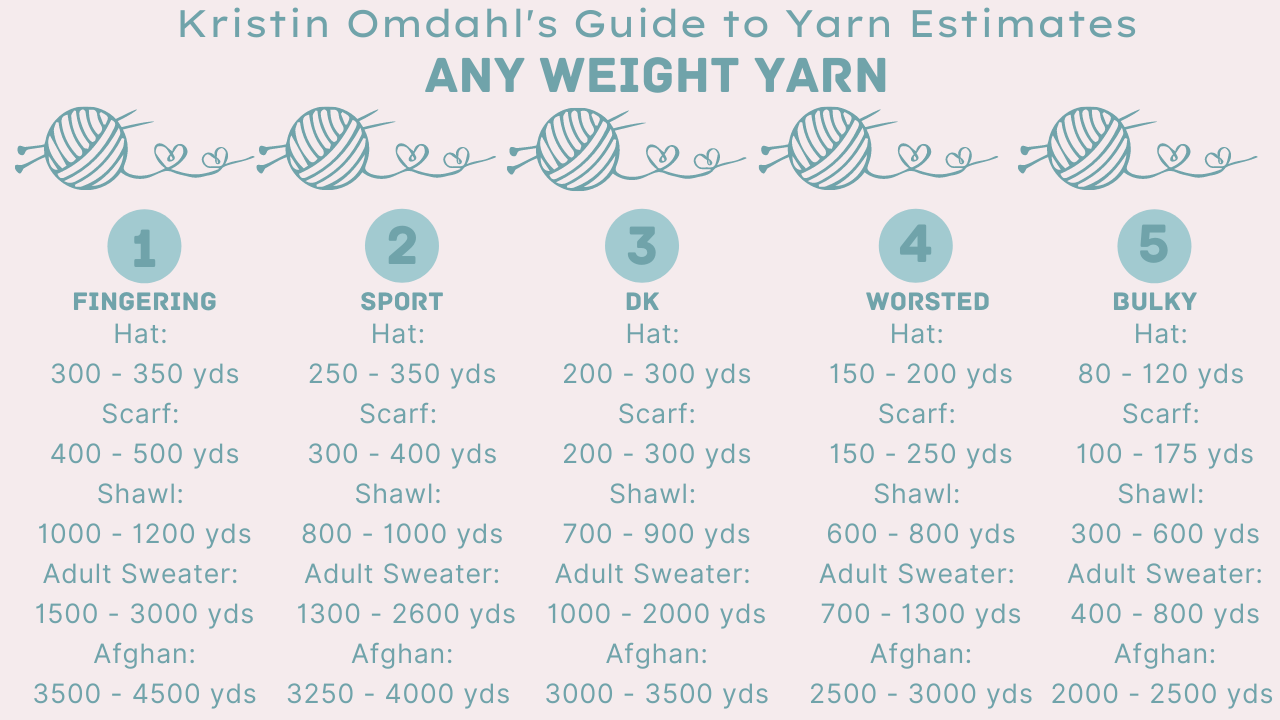
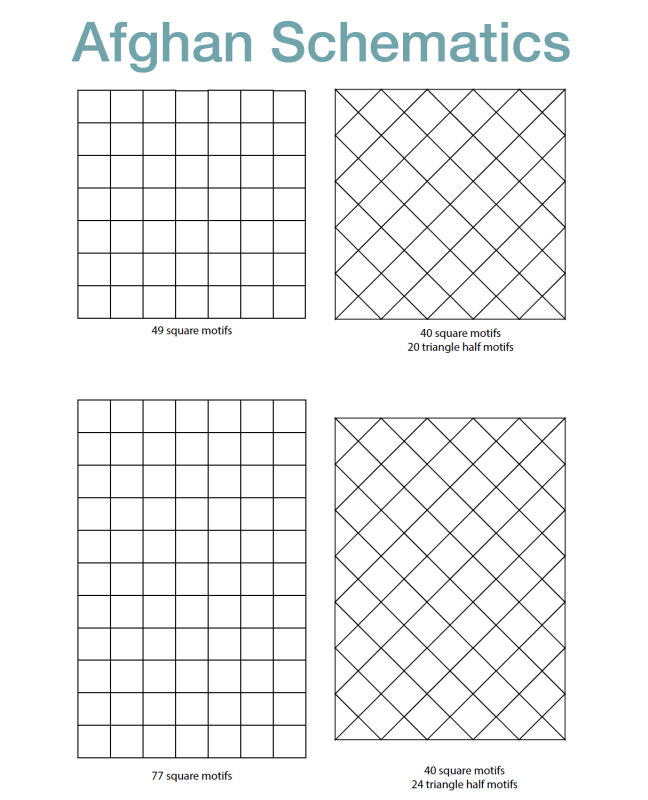
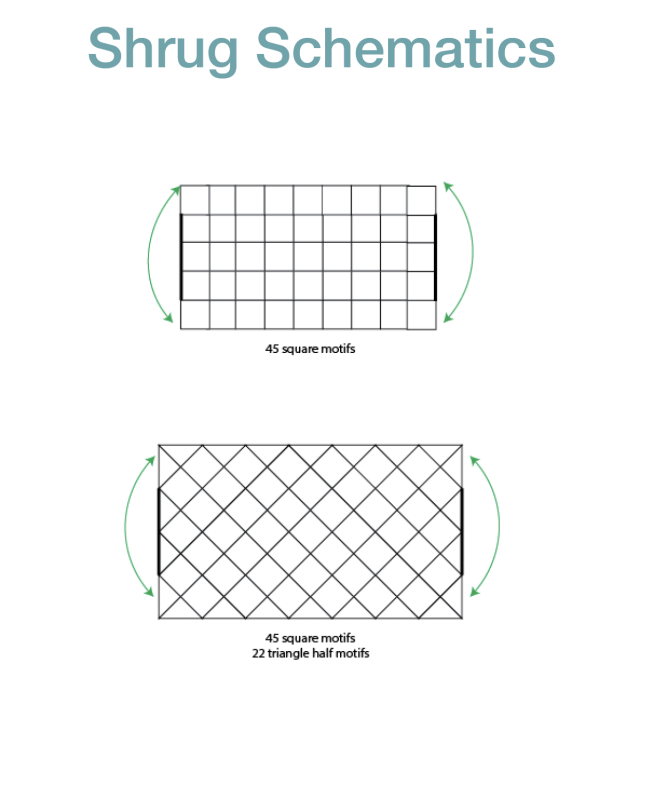
Before considering the following schematics, it is best to understand gauge to be sure your projects turn out the size you intend them to be.
Gauge:
The standard way to check gauge is to make a square of fabric about 4 in (10cm) wide by 4 in (10cm) tall (or a motif as indicated in the pattern for gauge) with the suggested hook or needle size and in the indicated stitch, with the recommended yarn. Hand wash your swatch and lay it flat to dry before measuring. We make things that need to be laundered! How the yarn is affected by water is a huge component to the measurement of gauge. If you are making lace, this is even more important. If your measurements match the measurements of the pattern’s gauge, congratulations! If your swatch is larger than 4 in (10cm) square, try going down in hook or needle size. If your swatch is smaller than 4 in (10cm) square, try going up in hook or needle size. Our personal tension is unique when working with our hands. You may even find that your personal tension varies with your mood, comfort level with a pattern, the time of day, and more.
Depending on how the gauge is listed in the pattern, you might need to measure a stitch and row count, a pattern repeat, or a motif. Make sure to pay attention to this detail.
The listed hook size(s) in a pattern are a suggested starting point. Your own unique tension may require a different sized hook to achieve proper gauge and that is perfectly normal and okay!
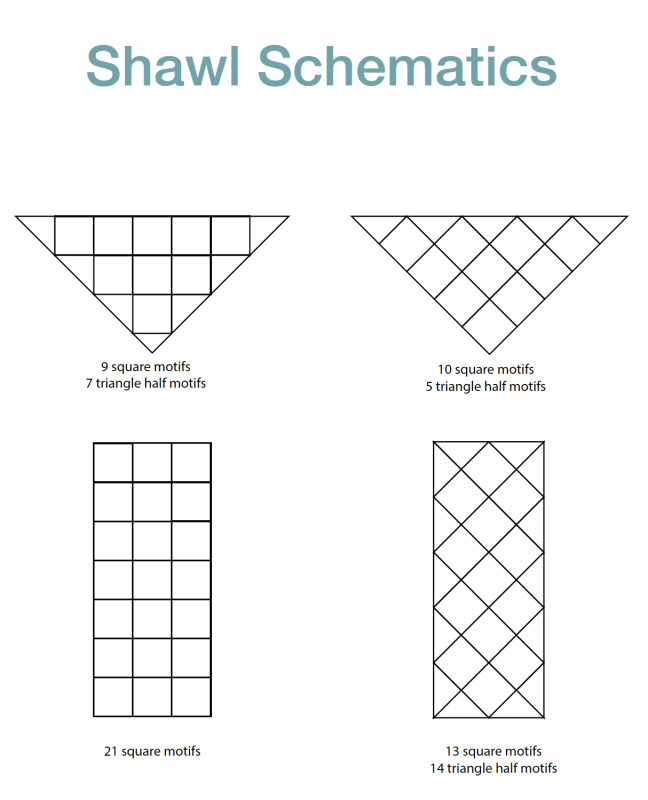
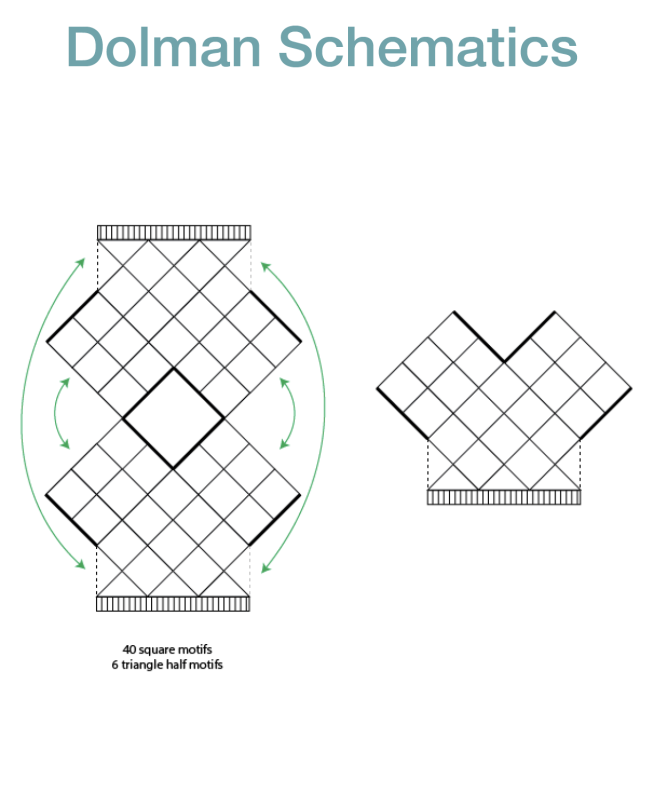
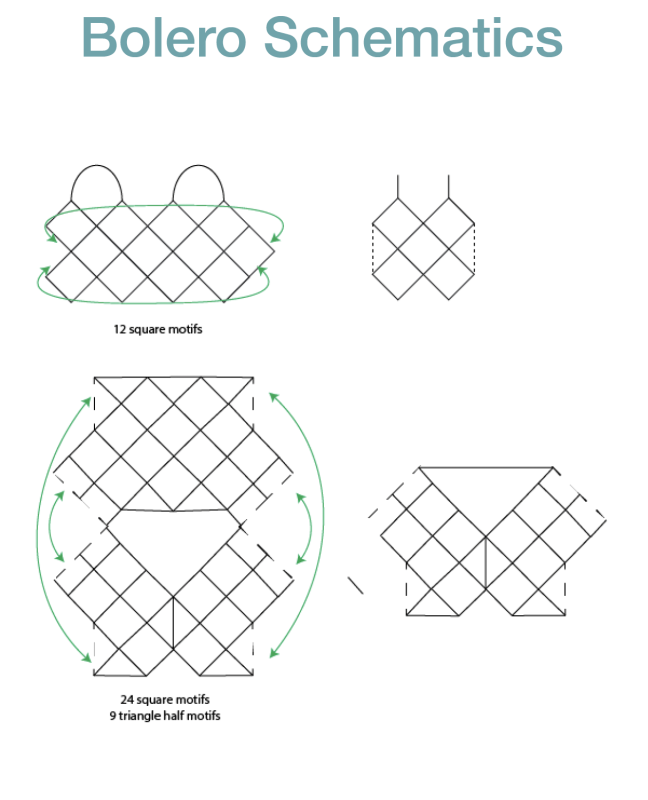
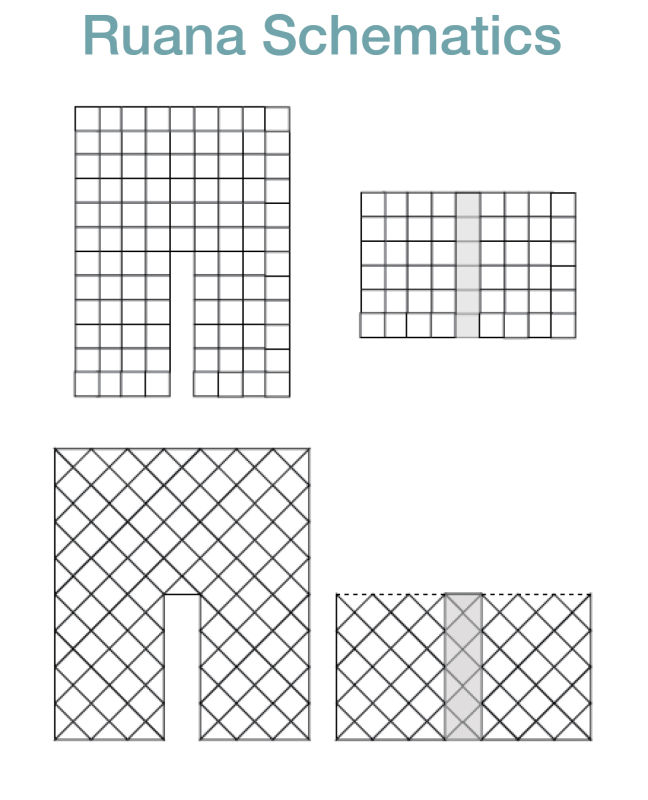
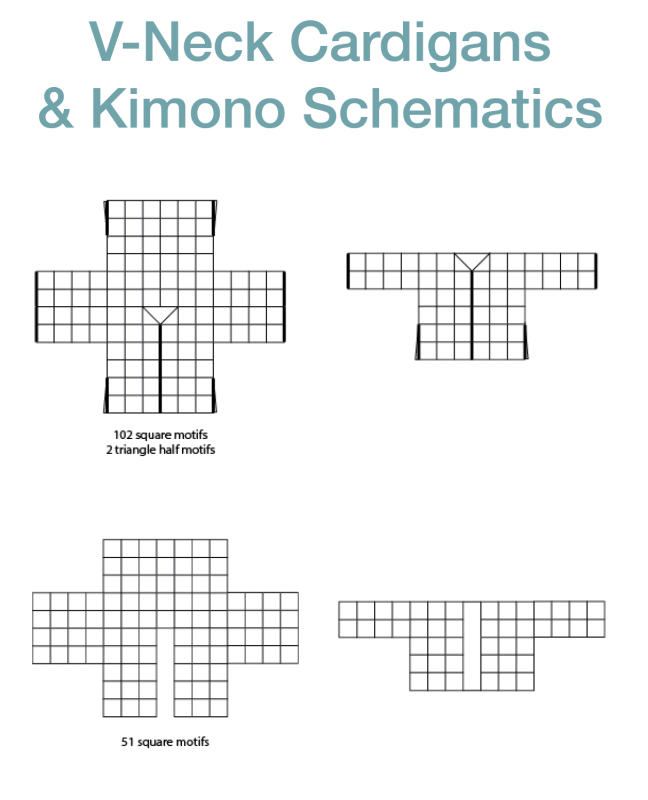
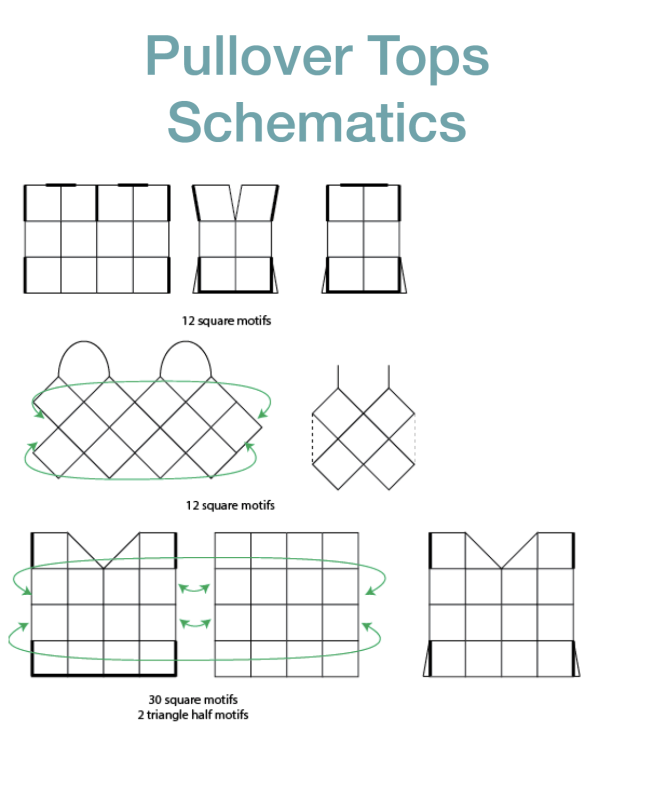
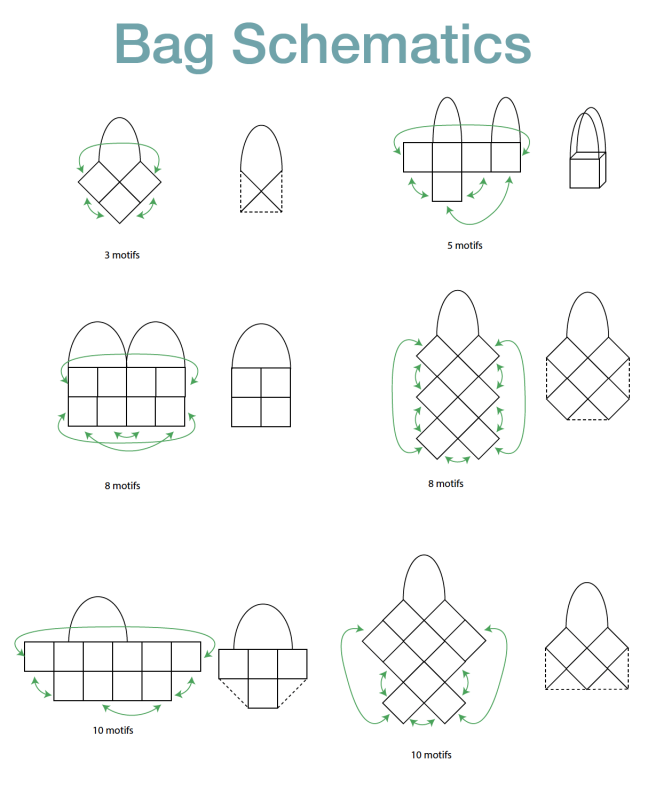
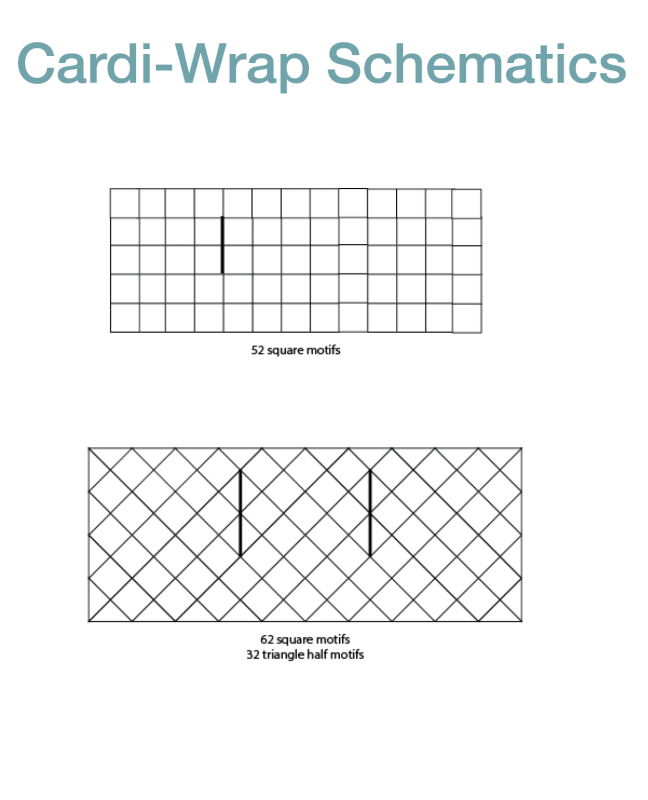
Here are some Crochet Schematics to Consider:
Shop all of Kristin Omdahl’s knitting and crochet patterns, books and courses here:
- Shop Kristin Omdahl Crochet Patterns
- Shop Kristin Omdahl Knitting Patterns
- Shop Kristin Omdahl Books
- Shop Kristin Omdahl Courses
- Browse Kristin Omdahl Videos
- Subscribe to my newsletter here
Thank you for purchasing a Kristin Omdahl pattern!
Kristin Omdahl patterns, books, handouts and videos are for your personal use only; additionally, up to 10 items can be made to sell from one design. Commercially produced products made from my instructions are prohibited. All Kristin Omdahl patterns, books, handouts and videos are licensed for single use and remain the intellectual property of Kristin Omdahl. This pattern may not be reproduced or transmitted in any form or by any means, electronic, mechanical, photocopying, recording or otherwise.
©Copyright 2023 All Rights Reserved