
DIY Furniture, Home Dec
DIY Crate Table
Jul
It has been a life long dream of mine to build furniture. I dream of having a garage full of woodworking tools and to build wooden furniture from scratch. I spend long hours dreaming of herringbone designs and parquet designs and mosaic tilework designs too.
Alas, I do not own a garage full of tools, or have the skills, experience or time to even begin. However, I realized that those are just excuses. We all have excuses for every dream we don’t pursue, am I right? So I decided to just begin. No more thinking, no more excuses, just do it. I chose a small and simple project, just as I would tell an aspiring knitter or crocheter. Start small , grow your confidence with instant gratification on a small project and go from there. And find something that excites you, as you will be more open minded and voracious to learn the skills to accomplish it.
Off to Pinterest I went. I found a table made from 4 wooden crates placed in a log cabin configuration. That seemed easy enough, and left a lot of design ideas to the imagination. Originally I thought it would be my coffee table, but the scale of the crates that I could readily find was too small for a coffee table. So I gave up, pouted because it wasn’t perfect, and went back to dreaming. Then I realized I needed a table on my balcony for a couple of adirondack chairs! Ding ding ding! We have a place for this smallish table after all!
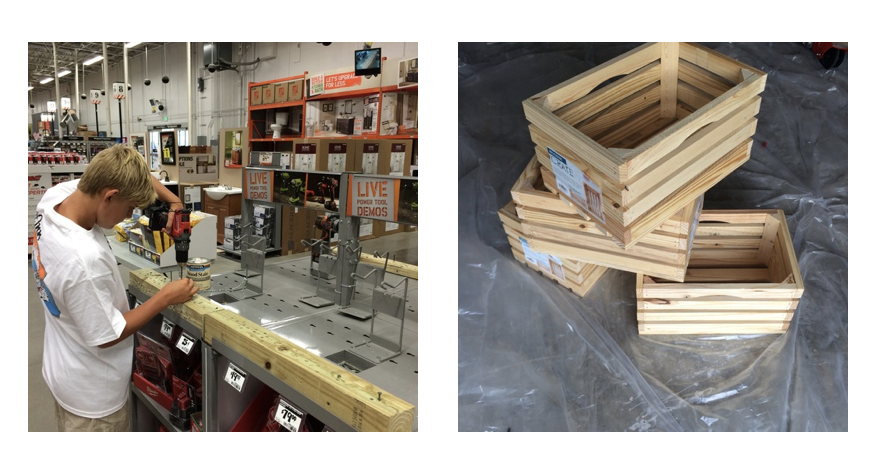
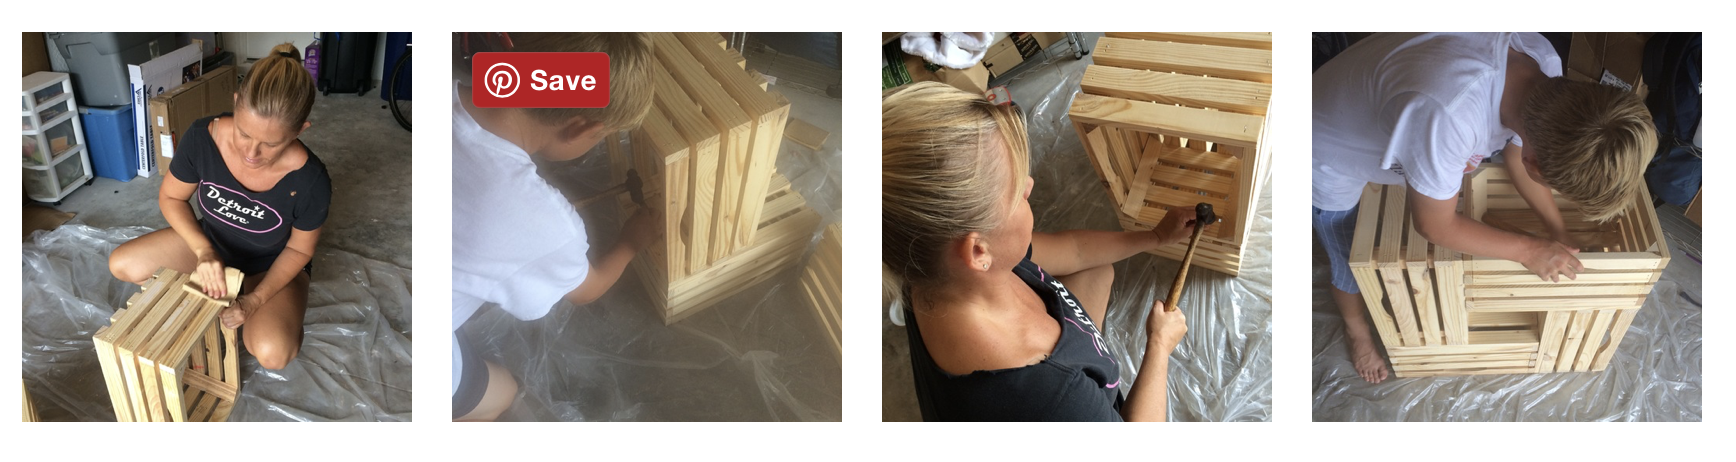
I bought the crates at Walmart for $9.95 a piece and just put them in a corner. I was committed enough to buy the supplies and still needed to carve out the time to make it. Then I enlisted Marlon’s help (thought it would be a great team project and a way to encourage him to build things) so the project climbed up higher on my priority list. We went to Home Depot to pick up supplies: nails, we already have a beautiful, old hammer I inherited from my late grandfather; sand paper, wood stain, polyurethane, paint brushes, a tarp and steel wool.
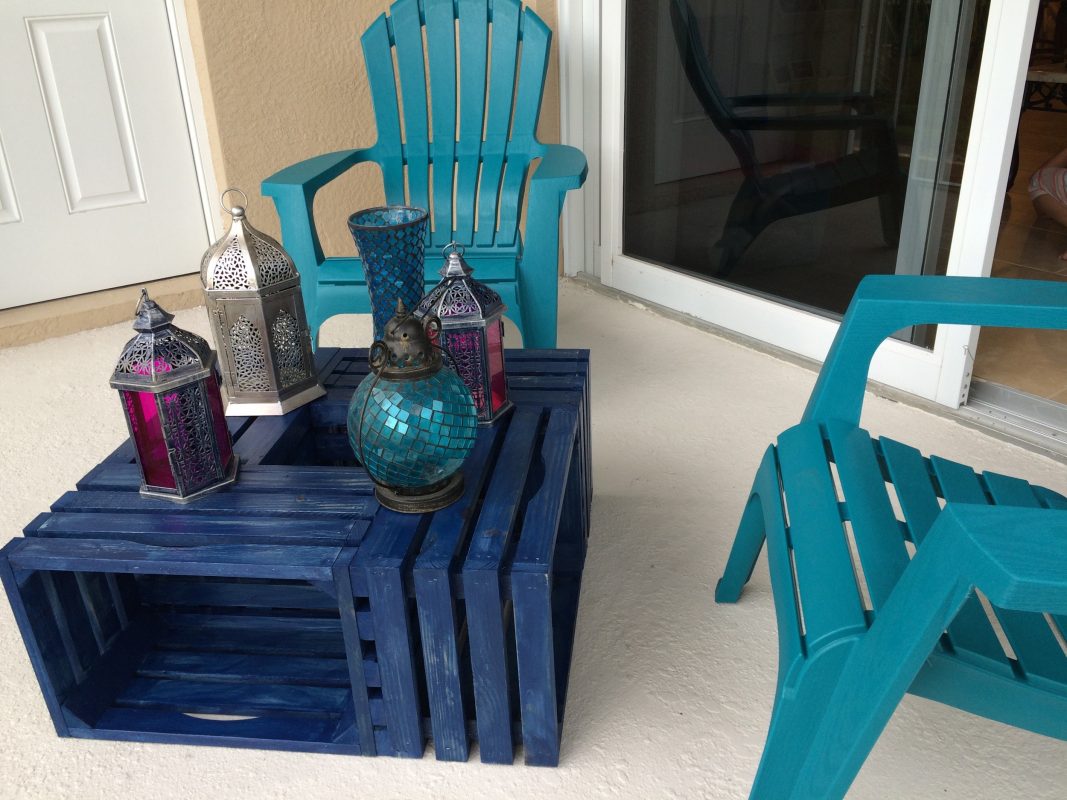
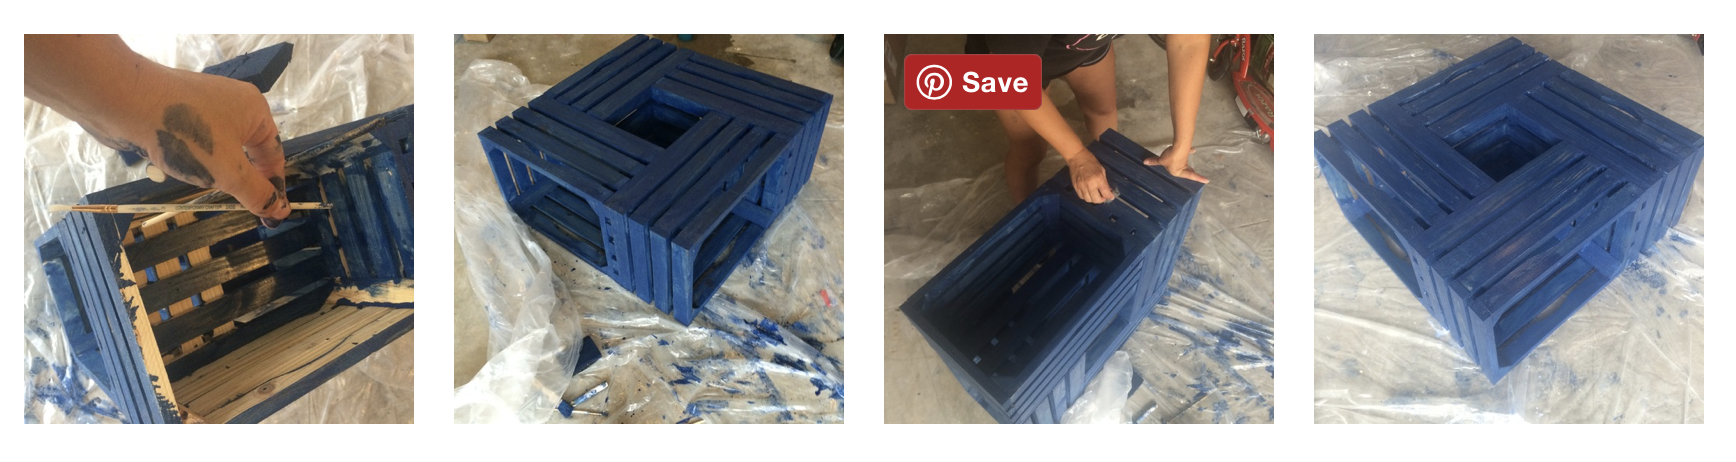
First we sanded the crates individually. Then nailed them together. Note: if I were to make this table again, I would have stained the crates individually and THEN nailed them together. Because, reaching every nook & cranny between the slats of the crates was very difficult once you stacked them together.We chose an Island Water tinted stain. It was supposed to turn out a medium teal color and the color was more marine blue. So one coat was all we used. And after it dried, I rubbed steel wool over all the surfaces to create a distressed look. My goal was to make it look like it was old, beat up and found on a beach.
After the stain dried, we applied a coat of satin (not gloss) polyurethane to seal in the stain. Let that dry, then put it out on the balcony!
So far, I have decorated it with some candle lanterns but I may end up putting a potted tree or plant in the center. And I love the storage compartments around the base. I may put extra candles down there, but haven’t decided yet. What would you put in there?
I was really worried about the teal chairs and the blue table clashing together. I giggled in relief once I put the whole thing together though. Do you recognize a few of my yarn colors? Blue Danube, Caribbean Turquoise and Crushed Berries? I see a design inspiration beginning in my head :))))

And now that I have one piece of furniture under my belt, I guess I can reward myself with making a second one? I think I have a few ideas… 😉
The one I saw made was done by gluing the crates together, and yes, stain/paint or whatever before putting them together. I like this though… long been meaning to do this for the house. As I work at The Home Depot, I have NO excuse LOL. And yes Depot carries a strong enough glue to do this 🙂