
Crochet, Free Crochet Pattern, Free DK weight yarn pattern, Free Knit Pattern, Knit, Patterns, Pet
How to Make Easy Knit and Crochet Mouse Catnip Toy for Cats FREE Knitting and Crochet Pattern
Mar
How to Make Easy Knit and Crochet Mouse Catnip Toy for Cats FREE Knitting and Crochet Pattern
by Kristin Omdahl
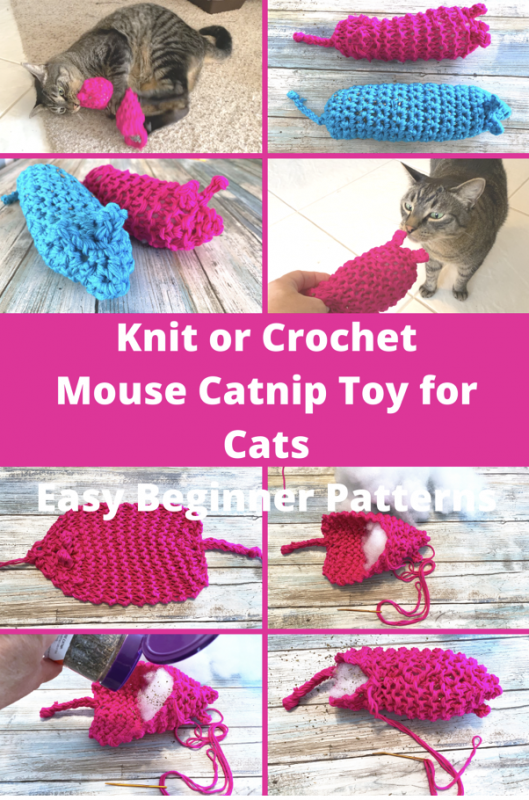
Easy quick and sure to please the kitties in your house! Beginner knitting project is worked flat in rows with simple stitches. Alternate the filing with sprinkles of catnip and get ready for the show!
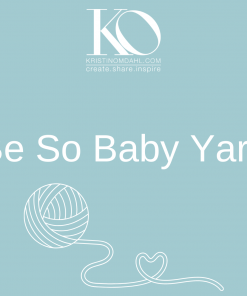
I loved involving my kitties in each step of the process. I know Becker happens to love the color pink, so choosing the color for his toy was easy! I used Be So Baby Yarn in color Diva. Several years ago, he swiped a hot pink bikini top of mine and has used it as his lovey every since.
Bjorn enjoyed helping me stuff the toys. As I alternated stuffing the fiberfill and sprinkling catnip in the toy while I was seaming it, he kept putting his paw on the toy and me – so cute!!!
You can watch a little video of Bjorn & Becker’s first reaction to the knit and crochet cat toy patterns here:
You can get the ad-free PDF pattern for these knit and crochet toy patterns for $0.99 HERE
#3 DK Weight Yarn
Materials for making the Knit Version of the Catnip Mouse Free Pattern:
#3 DK Weight Yarn
-
1 ball Be So Baby Yarn; 100% milk (casein) fiber: 142 yds (130m) per 1.7oz (50g) ball, color Diva.
-
US 13 (9mm) knitting needles, circular or double pointed
-
Fiberfill
-
Catnip
-
Yarn needle
-
Scissors
Gauge: Gauge is not critical for this project.
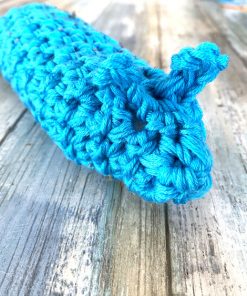
Finished size: 5 in (12.7cm) long not including tail, 2 in (5cm) wide
Instructions for making the Knit Version of the Catnip Mouse Free Pattern:
Note: Mouse is worked flat, beginning with the tail and ending with the nose. The ears are worked into a row with picots (seamless) and the mouse is sewn together down the belly side after fastening off.
Note: Yarn is chain plied into 3 strands before you begin knitting. You can watch a video on how to chain ply your yarn HERE or you can hold 3 strands of yarn together from 3 different balls.
Row 1: CO 2 sts, knit across. — 2 sts
Row 2: Slide sts to opposite end of double pointed or circular needle, k2.
Rows 3 – 12: Rep row 2. (i-cord)
Row 13: Kfb in ea st. — 4 sts
Row 14: Kfb in ea st. — 8 sts
Row 15: Kfb in ea st. — 16 sts
Rows 16 – 40: Knit across. — 16 sts
Row 41: *K2tog, k2. Rep from * across. — 12 sts
Row 42: K5, KCO 3 sts, BO 3 sts, k2, KCO 3 sts, BO 3 sts, 5. — 12 sts
Row 43: *K2tog, k1. Rep from * across. — 8 sts
Row 44: Knit across. — 8 sts
Row 45: K2tog across. — 4 sts
Row 45: Knit across. — 4 sts
Row 46: K4tog, fasten off last st. Leave 12 in (30cm) tail for assembling the mouse.
Assembly: Thread the long tail onto a yarn needle and begin seaming up the body, add bits of fiberfil as you go. When you are 1/2 in (1.2cm) from completely seamed, add an extra bit of fiberfil to make the mouse full and plump before finishing.
Weave in loose ends.
Materials for making the Crochet Version of the Catnip Mouse Free Pattern:
-
1 ball Be So Baby Yarn; 100% milk (casein) fiber: 142 yds (130m) per 1.7oz (50g) ball, color Diva.
-
L/11 (8mm)) crochet hook
-
Fiberfill
-
Catnip
-
Yarn needle
-
Scissors
Gauge: Gauge is not critical for this project.
Finished size: 5 in (12.7cm) long not including tail, 2 in (5cm) wide
Instructions for making the Crochet Version of the Catnip Mouse Free Pattern:
Note: Mouse is worked flat, beginning with the tail and ending with the nose. The ears are worked into a row with picots (seamless) and the mouse is sewn together down the belly side after fastening off.
Note: Yarn is chain plied into 3 strands before you begin knitting. You can watch a video on how to chain ply your yarn HERE or you can hold 3 strands of yarn together from 3 different balls.
Ch14 (tail)
Row 1: 2sc in 2nd ch from hook. — 2 sts
Row 2: Ch1, 2sc in ea st across. — 4 sts
Row 3: Ch1, 2sc in ea st across. — 8 sts
Row 4: Ch1, 2sc in ea st across. — 16 sts
Rows 5 – 34: Ch1, sc in ea st across. — 16 sts
Row 35: Ch1, *sc2tog over next 2 sts, 1sc in ea of next 2 sts. Rep from * across. — 12 sts
Row 36: Ch1, 1sc in ea of next 5 sts, ch5, slst in 5th ch from hook (picot ear), 1sc in ea of next 2 st, ch5, slst in 5th ch from hook (picot ear), 1sc in ea of next 5 sts. — 12 sts, 2 picot ears
Row 37: Ch1, sc2tog over next 2 sts, 1sc in next st. Rep from* across. — 8 sts
Row 38: Ch1, sc in ea st across.
Row 39: Ch1, sc2tog across. — 4 sts
Row 40: Ch1, sc in ea st across.
Row 41: Ch1, sc4tog. — 1 sts
Fasten off.
Assembly:
Assembly: Thread the long tail onto a yarn needle and begin seaming up the body, add bits of fiberfil as you go. When you are 1/2 in (1.2cm) from completely seamed, add an extra bit of fiberfil to make the mouse full and plump before finishing.
Finishing:
Weave in loose ends.
Kristin Omdahl patterns are for your personal use only and not to be used to create items for commercial gain. All Kristin Omdahl patterns are licensed for single use and remain the intellectual property of Kristin Omdahl. This pattern may not be reproduced or transmitted in any form or by any means, electronic, mechanical, photocopying, recording or otherwise.
©Copyright 2020 All Rights Reserved
Shop Kristin Omdahl Yarns HERE
Shop Kristin Omdahl Crochet Patterns HERE
Shop Kristin Omdahl Knitting Patterns HERE
I would love to see your creations. Just as much fun as making these myself is the satisfaction I get from seeing my designs come to life and other crochet fans wearing them too. There are now 2 ways you can share what you have done!
- Share yours by joining Create. Share. Inspire on Facebook where you can interact with me as well as many other members who have a love of knitting and crochet just like you! It is a wonderful and safe place to share your photos of finished projects in my knitting or crochet patterns or yarns, and to see what others are making, too.
- I have recently added a wonderful new interactive section to the website which I invite you to take part in, it has been a smashing success and such fun so far. It is the new “Share Your Project” section. You, my creators, can upload images and descriptions of your creations to share with the ever growing community! To upload simply click here.
Additionally, I host a livestreaming podcast weekday on my YouTube Channel called Create Share Inspire Podcast. You can join the audience and even ask me questions LIVE! I often do a show and tell, or quick demo and I always interact with the live audience. It is a lot of fun!
You can browse through close to 1000 previously recorded episodes HERE: Create Share Inspire Podcast Playlist . Make sure to subscribe to my YouTube Channel to get reminders when the next episode airs LIVE.
I look forward to seeing what you create!
Kristin donates a portion of every sale to her charity Project Kristin Cares, which supports survivors of domestic violence. Learn more at KristinOmdahl.com/PKC
xoxo,
Kristin